HOW TO MAKE A KATE SPADE INSPIRED CHRISTMAS TRAY YOU’LL LOVE!
Create a chic, Kate Spade inspired DIY Christmas tray in just one afternoon!
This easy DIY project adds a touch of modern glam to your holiday entertaining and makes a perfect festive gift idea.

Okay … this is my FAVORITE DIY Christmas craft. Like hands down, my favorite.
And my all friends agree.
These DIY Christmas trays are just simply adorable.
Some of them have even requested them as gifts. And I’m hoping to finally make that a reality this holiday season.
We. Shall. See.
And yes, they are Kate Spade inspired! I’ve also maybe taken a bit of license from Pottery Barn as well.
Because, those two brands have some TRULY adorable Christmas decor every season.
But sometimes the price tag is a bit steep. I could spend a literal fortune on their holiday accessories.
I know you know the feeling …
But at a time of year when it seems all you’re doing is spending money, it’s hard to justify spending money on decor items for yourself.
‘Tis better to give than receive is the mantra of Christmas, right? Well … sometimes. LOL. Ugh. But you still want all of the cute things. At least I do!
Fear not! I am about to show you how you can create this ridiculously cute, designer-inspired DIY Christmas tray in an afternoon.
You are about to be so impressed! And so are your friends! Because this DIY Christmas tray idea, with its adorable design, is also a great hostess gift, teacher gift or simply a wonderful addition to your own Christmas decorations.
I can’t wait to show you how to make them, step by step!
HOW TO MAKE A KATE SPADE INSPIRED CHRISTMAS TRAY YOU’LL LOVE: STEP ONE
Posts on Make Every Day an Event may contain affiliate links which means we may earn a small commission on purchases at no extra cost to you. To learn more, please read our full disclosure here.
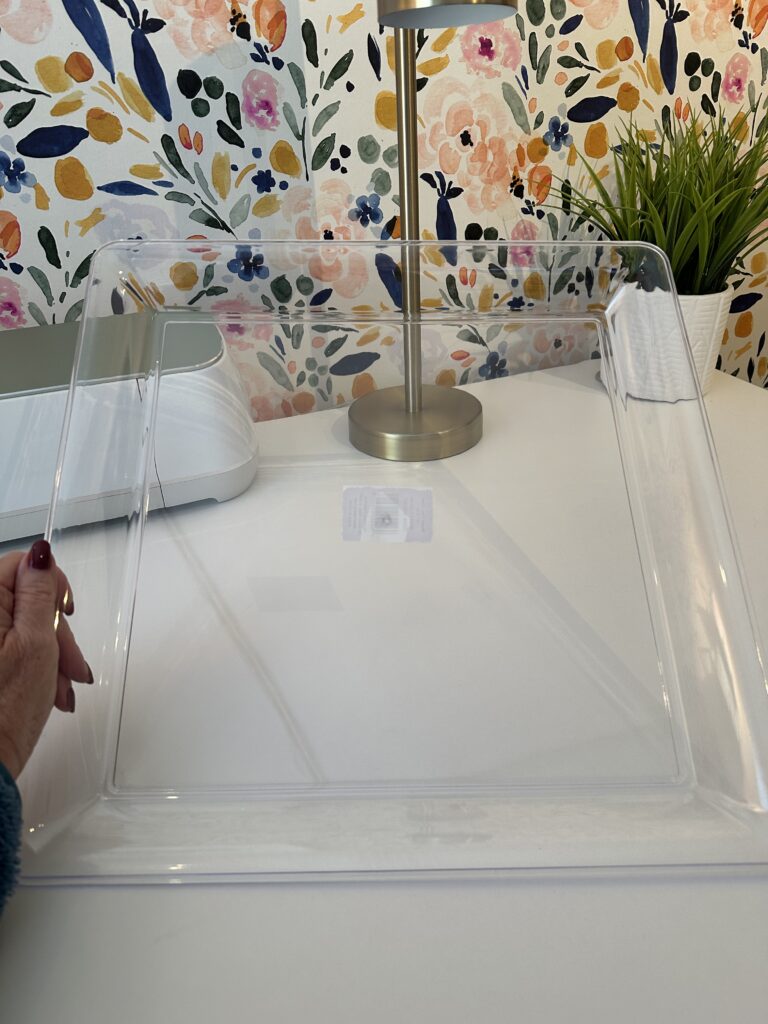
So as I was sleuthing how to create these trays, I stumbled upon the secret to the project. It’s using clear, lucite plastic trays.
These trays are available at Dollar Tree or you can buy them on Amazon. I ordered several of the blanks last week and can’t wait to get started on the trays for this holiday season.
Here are the sizes and styles I ordered (because honestly, I didn’t have time to go to Dollar Tree and needed them to just be delivered to my door):
These 16″ x 16″ heavy duty square plastic trays are ideal for this project
An oblong tray is also a great choice and these 14″ x 9″ ones are perfect
A divided tray like this one is also a great option and super cute!
HOW TO MAKE A KATE SPADE INSPIRED CHRISTMAS TRAY YOU’LL LOVE: STEP TWO
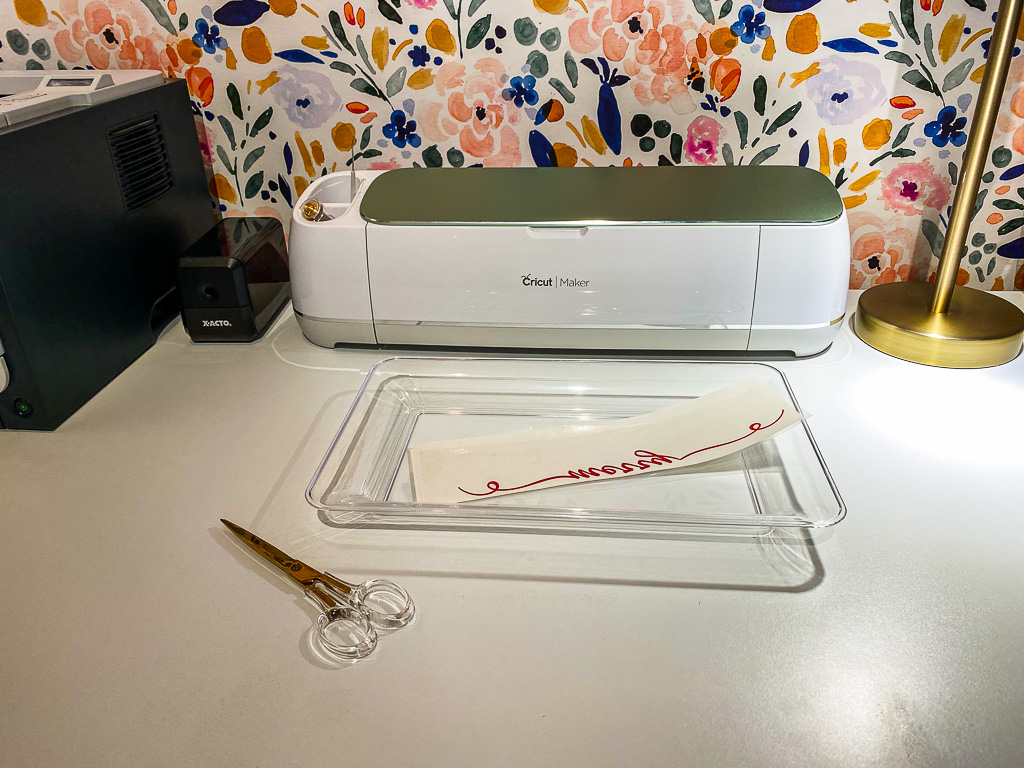
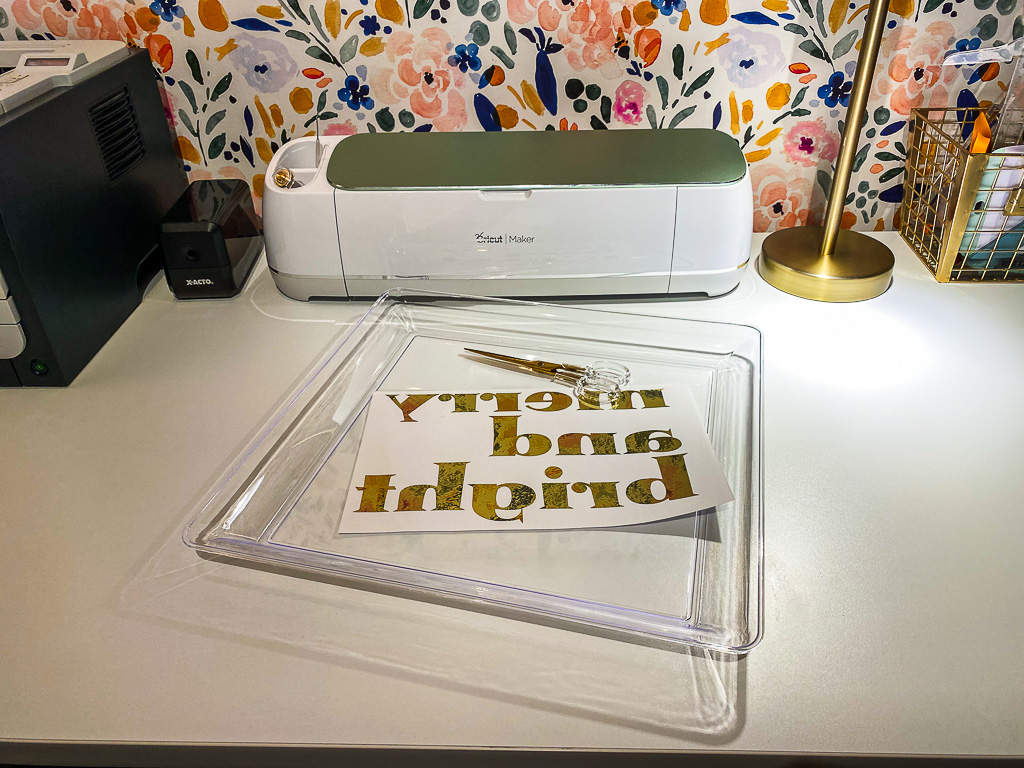
This is a craft project where you need to crank up the Cricut. But as most of you know, my Cricut skills are intermediate at best. And I loath weeding. So the skill level needed for this project is truly not intimidating.
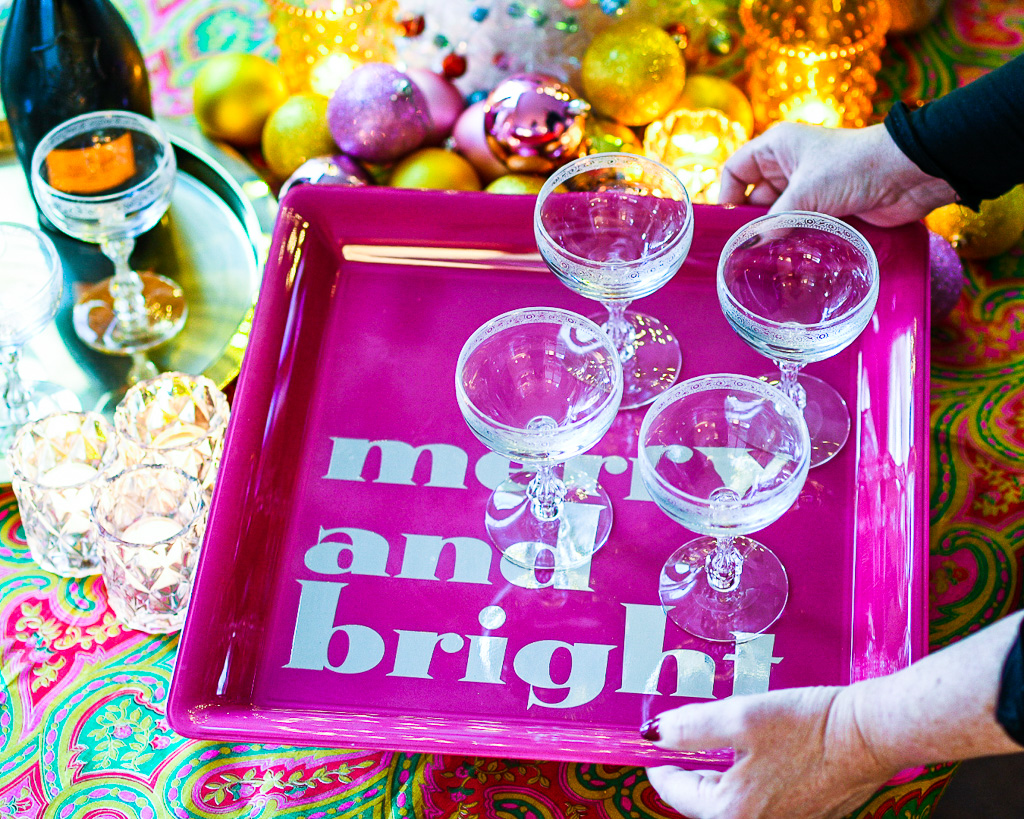
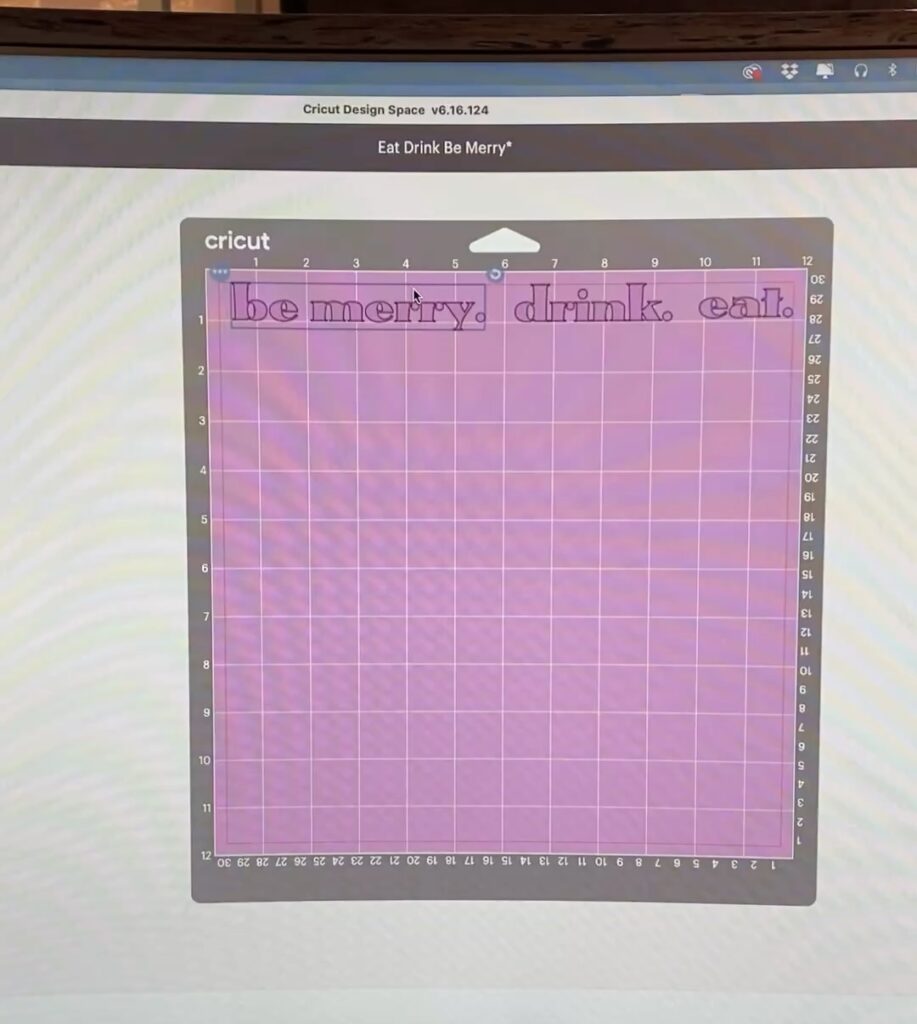
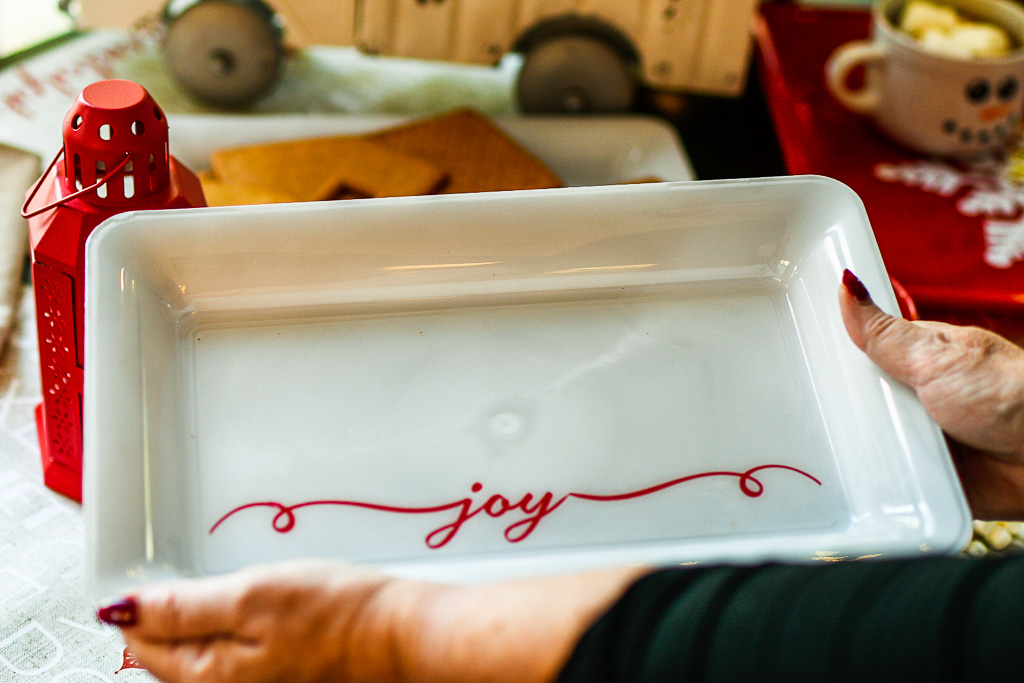
The key is to choose the right fonts. For this “Eat. Drink. Be Merry.” tray, I chose Metropolis as the font for this project. The font size was 148 for the square tray.
In addition to the right typeface, a big part of the Kate Spade vibe is for the words to fill up the tray, so the large font is essential.
Another key is to make sure you mirror when you cut the vinyl transfer.
Because all of the crafting for this project will be done on the back of the lucite tray. You’ll apply the vinyl transfer to the back and then spray paint over it. So the words need to be reversed.
The primary reason for this is to make your tray functional. You do not want to place or serve food items on top of the vinyl or spray paint.
The glossy finish of the lucite plastic tray will also be retained. It will be perfect!
After the words are cut, continue to weed them. The final part of this step is to use transfer tape to adhere the words to the back of the tray.
I love using these Cricut tools for this step:
A Cricut Maker
Permanent vinyl (I like the Oracal brand in metallic gold vinyl, red vinyl and white vinyl for this project)
Cricut weeding tool and burnisher
Sharp pair of scissors (bonus that they’re cute too!)
HOW TO MAKE A KATE SPADE INSPIRED CHRISTMAS TRAY YOU’LL LOVE: STEP THREE
The most important step of this project is next … spray painting the back of the trays. When choosing colors to use for both the vinyl decal and the spray paint, think about the vibe you are trying to create.
For my Kate Spade-inspired tray, I chose gold for the vinyl and hot pink for the spray paint. While hot pink is not a “traditional” Christmas color, I think it just works. And it’s very “Kate Spade-y” (I’m not sure that’s even a word. LOL.).
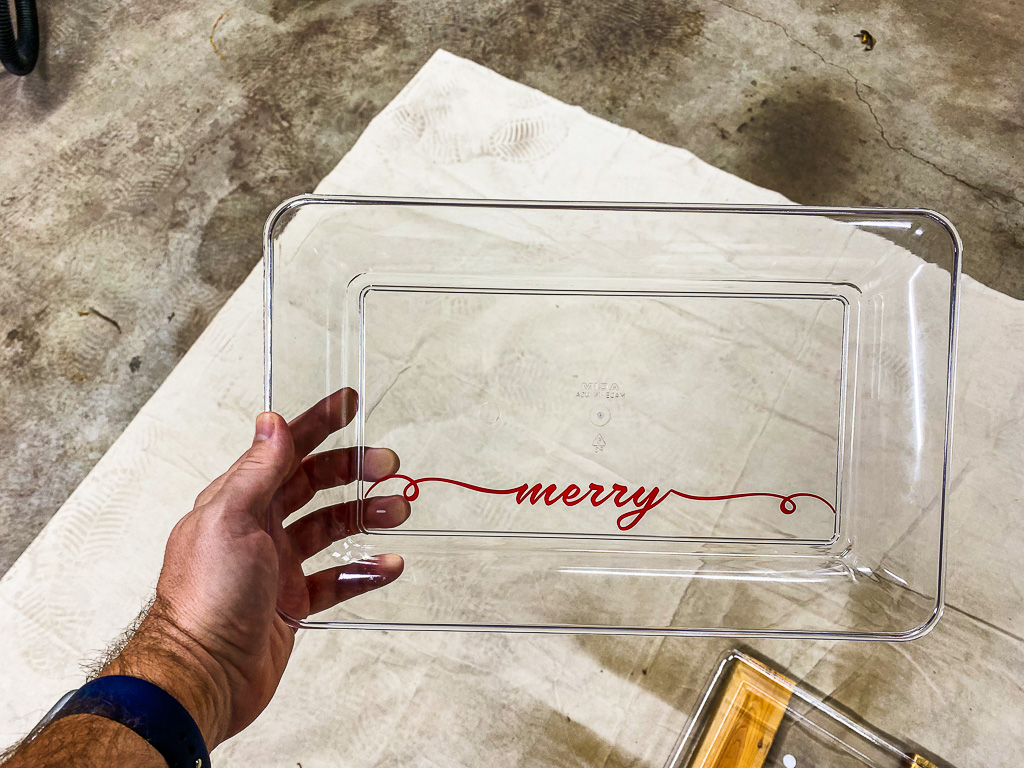
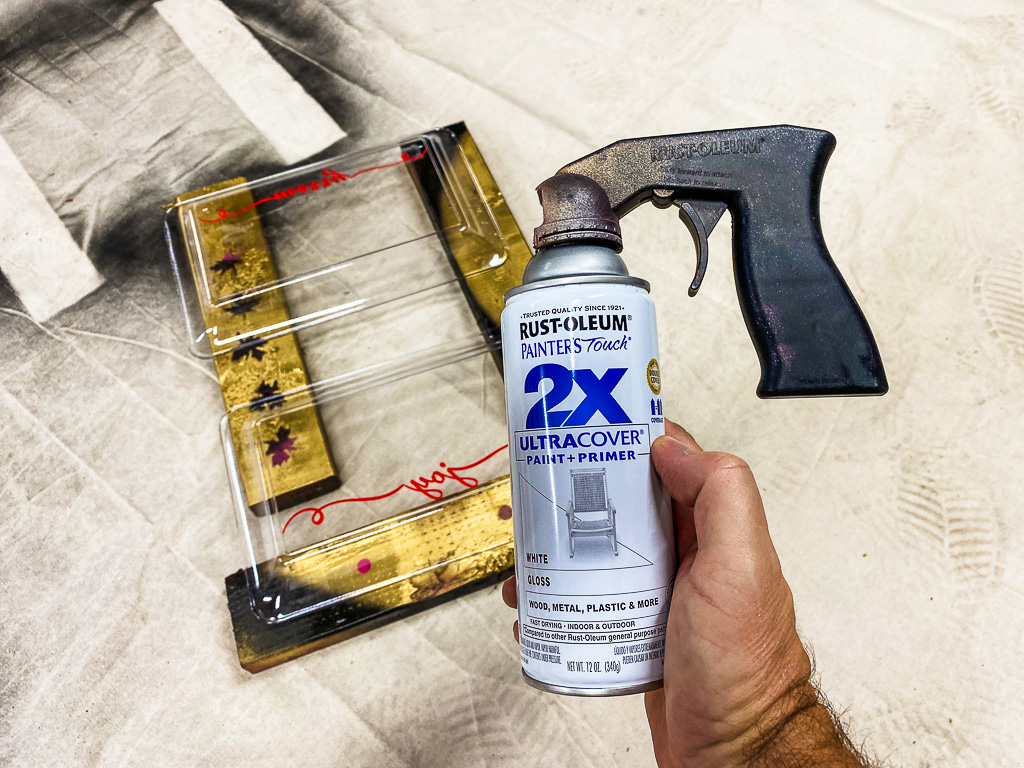
The more Pottery Barn looking tray I’m creating needed more traditional colors. So I chose red lettering in a script font.
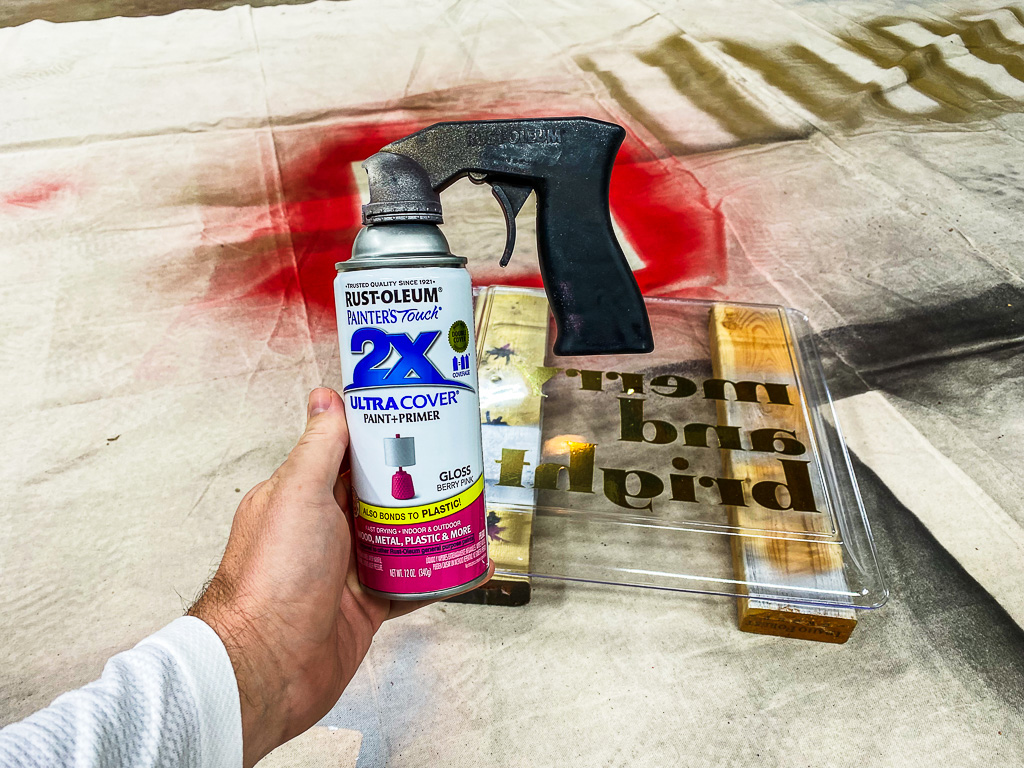
There are two key rules to this part of the project. The first one is to affix this Rust-oleum comfort grip nozzle to your spray paint can. TRUST me. It’s the best $10 you will ever spend on DIY equipment. And you’ll find yourself using it over and over again.
The second rule (which is made significantly easier by following the first) is to make sure you spray the back of the entire tray evenly.
As I said earlier, you want to apply the spray paint to the back of the tray. The nozzle handle on the spray paint can will go a long way to ensure the coats of paint you are applying turn out evenly.
But you also need to make sure you cover all of the tray evenly, especially with the darker colors. You don’t want to see holes or streaks.
It’s a little bit tricky but not impossible. You may have to apply two coats and then a bit of a touch up, which is why you want to spray paint in a well ventilated area, like your garage.
HOW TO MAKE A KATE SPADE INSPIRED CHRISTMAS TRAY YOU’LL LOVE: STEP FOUR
This is the easiest step of the entire project. What is it? Well it’s to simply figure out how you are going to use your adorable new holiday tray!
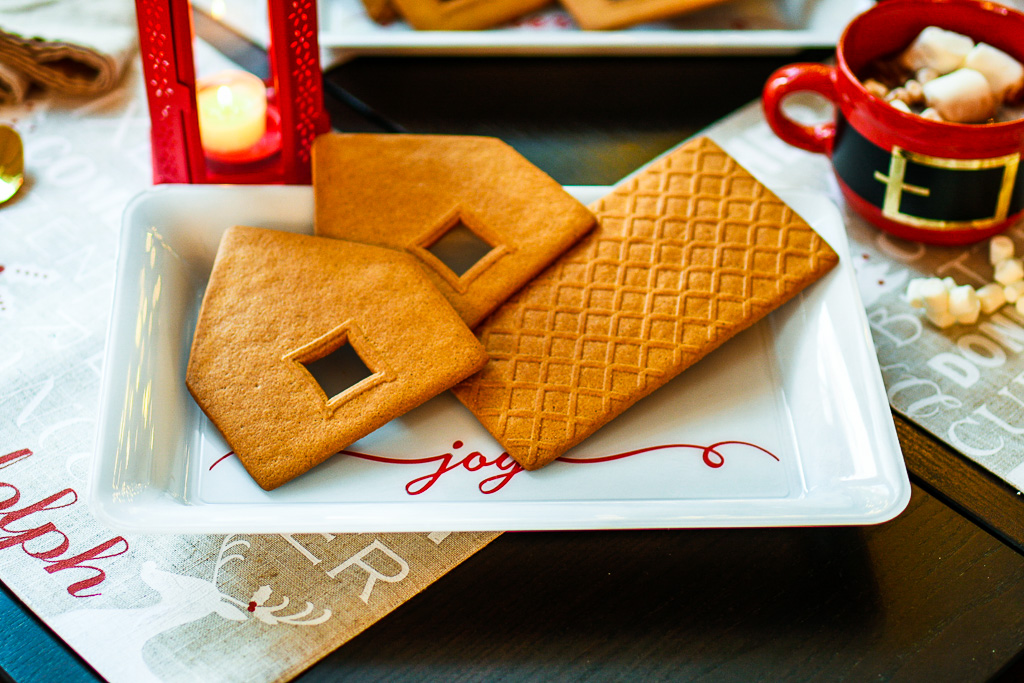
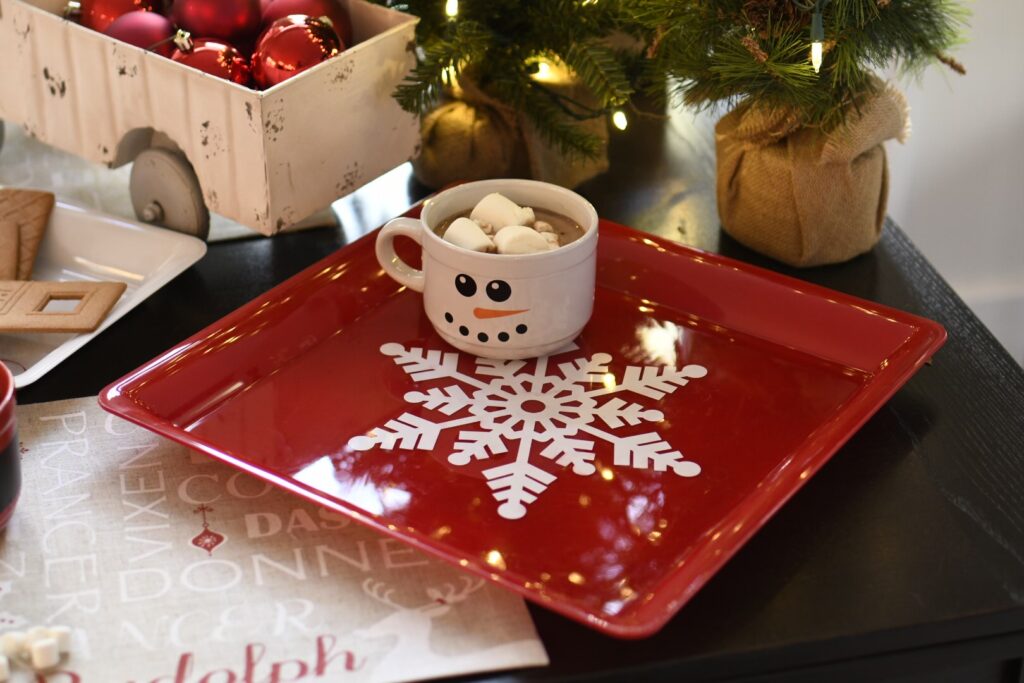
I think the square shape is the perfect size to hold a variety of drinks or to place on your coffee table. These DIY Christmas trays are also great for a cocoa bar … just look at how cute this is with the snowman mug! For another look you could add some Christmas trees or a tree shape to the adorable design.
Just use your creative flair, there are a lot of different ways and awesome ideas you can bring to this project. That’s the fun part!
And on Christmas Eve you can fill the tray with candy canes, cookies, pine cones, and all sorts of other goodies for Santa’s visit.
Here are some other great DIY Christmas craft projects you’ll love:
These Snowman and Santa mugs are a great teacher gift
This vintage sheet music craft is easy and charming
I love these mercury glass candle holders for Christmas
Like our style? Follow us on social media! You can find us on Instagram, Pinterest, and Facebook.
If you have any questions or suggestions, contact us or leave a comment!