
DIY CACHEPOTS ARE AN ADORABLE AND EASY OUTDOOR TABLE DECORATION IDEA!
Looking for easy outdoor table decoration ideas? Create DIY cachepots. They’re simple to make and look adorable on your summer tablescape.
Creating DIY cachepots was easy and took just a few simple steps.
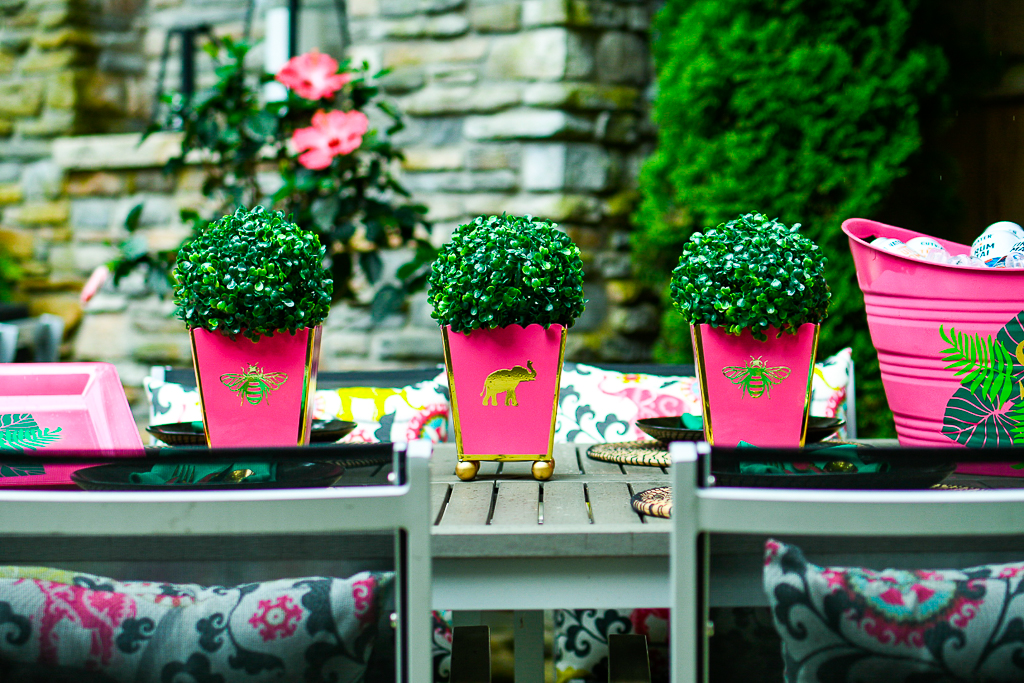
I am thrilled with how these adorable cachepots turned out. They are just perfect on our patio table! I crafted the charming pieces in just one afternoon and can’t wait to show you how I did it.
To be honest, I’ve been drooling over the cachepots from Jayes’ Studio for quite some time. Almost every day, they seem to pop up in my Facebook feed.
They are just so preppy, chic and classic. But at $47 a pot, they were also just so expensive.
And since I wanted to put three of them on our outdoor table, I was looking at a total price tag of more than $150. Yikes.
So, I decided to try my hand at creating a DIY cachepot. The result was the look for less, a LOT less! And I still can’t believe how great these turned out!
For months, I have been on the lookout for outdoor accessories to match our cute, new toss pillows.
I wanted something that would run down the center of our outdoor table and I always like to decorate the tabletop in threes.
In years past, I’ve placed small planters with hardy annuals (think vinca) on the table. But they can get really messy when it rains.
The dirt from the pots invariable falls out onto the table and just creates a disaster. Cleaning it up often makes the situation worse, since water and dirt equals mud.
It’s simply not convenient for a dining table that’s frequently used.
IT ALL BEGAN AT DOLLAR TREE …
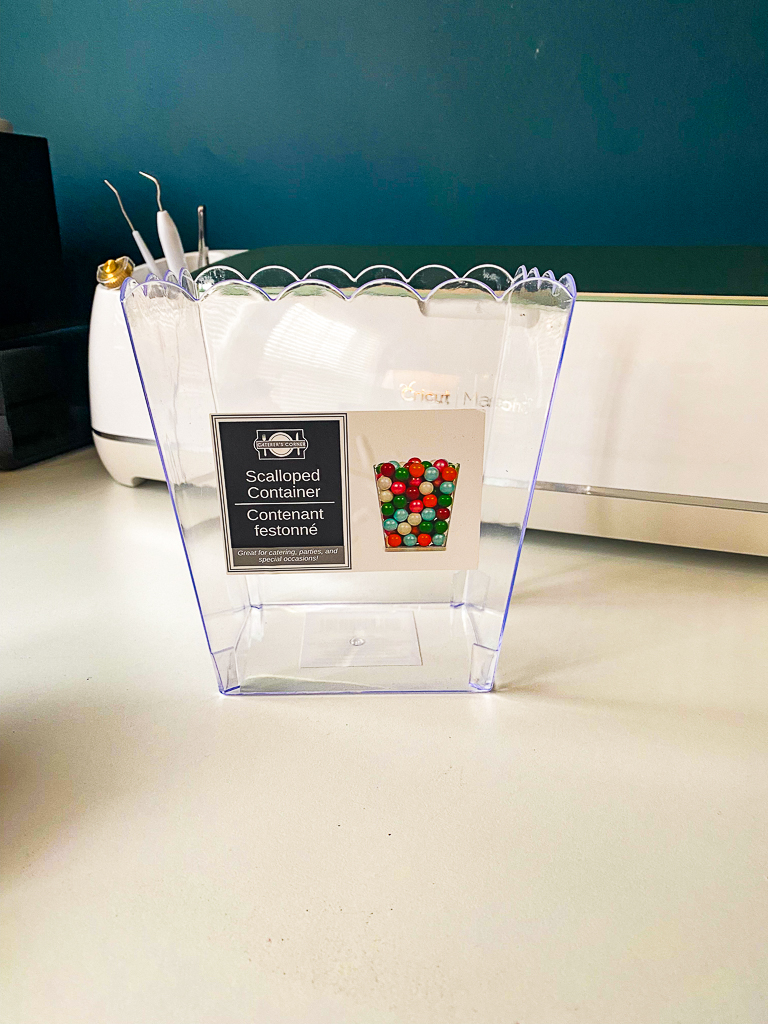
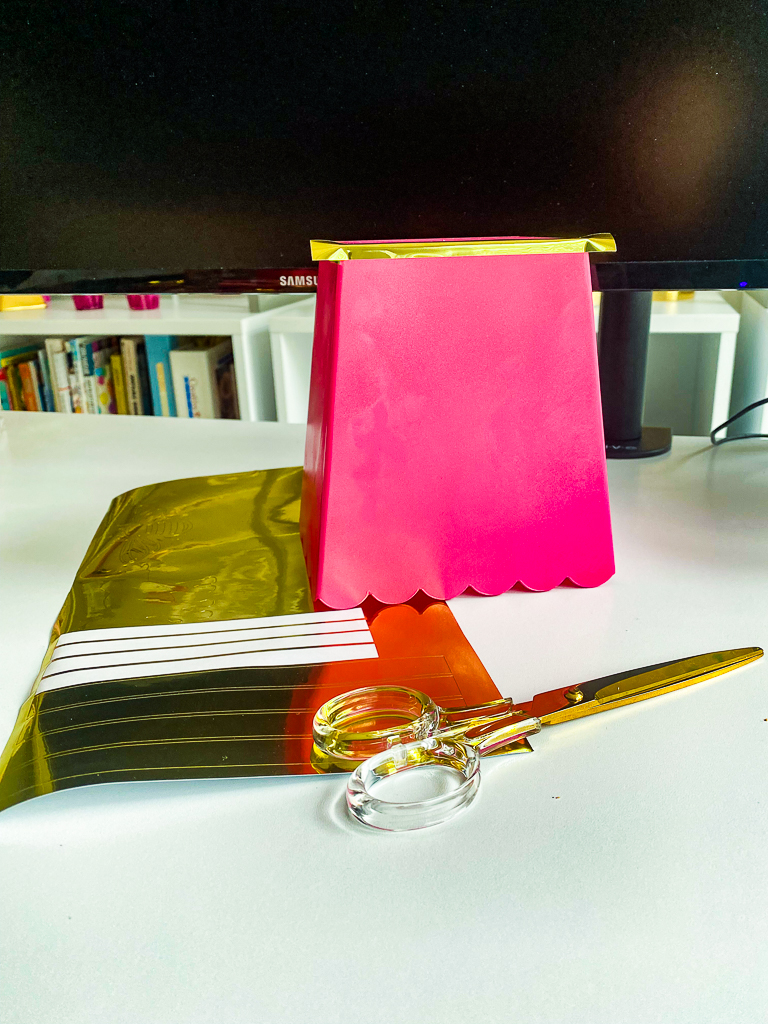
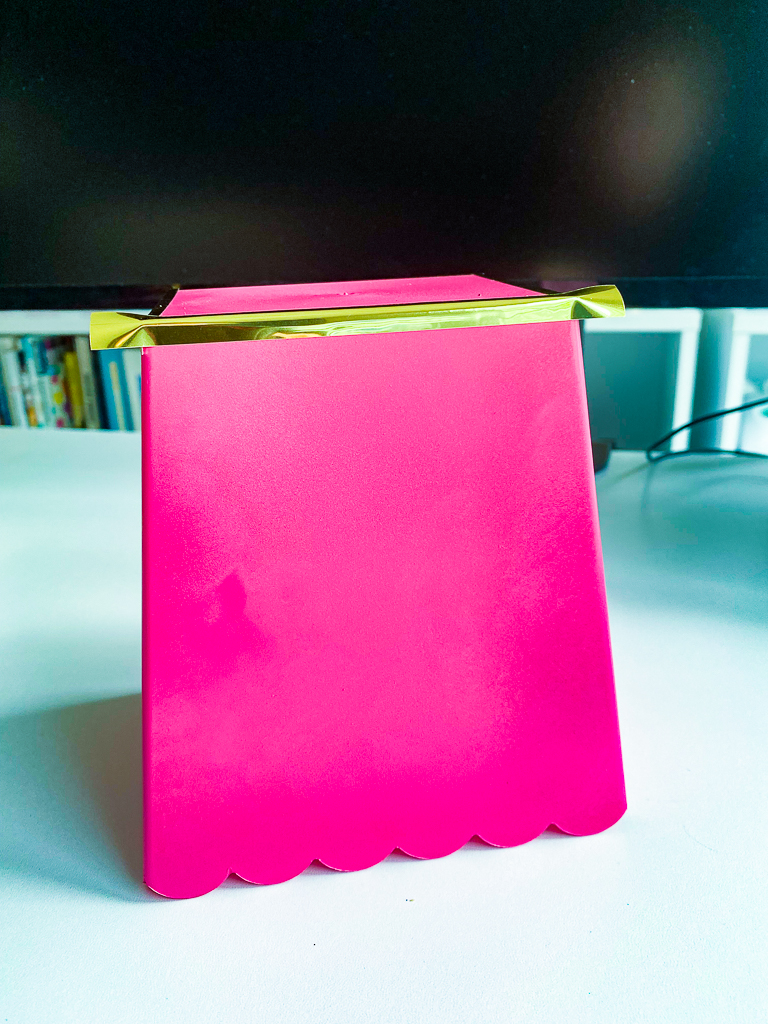
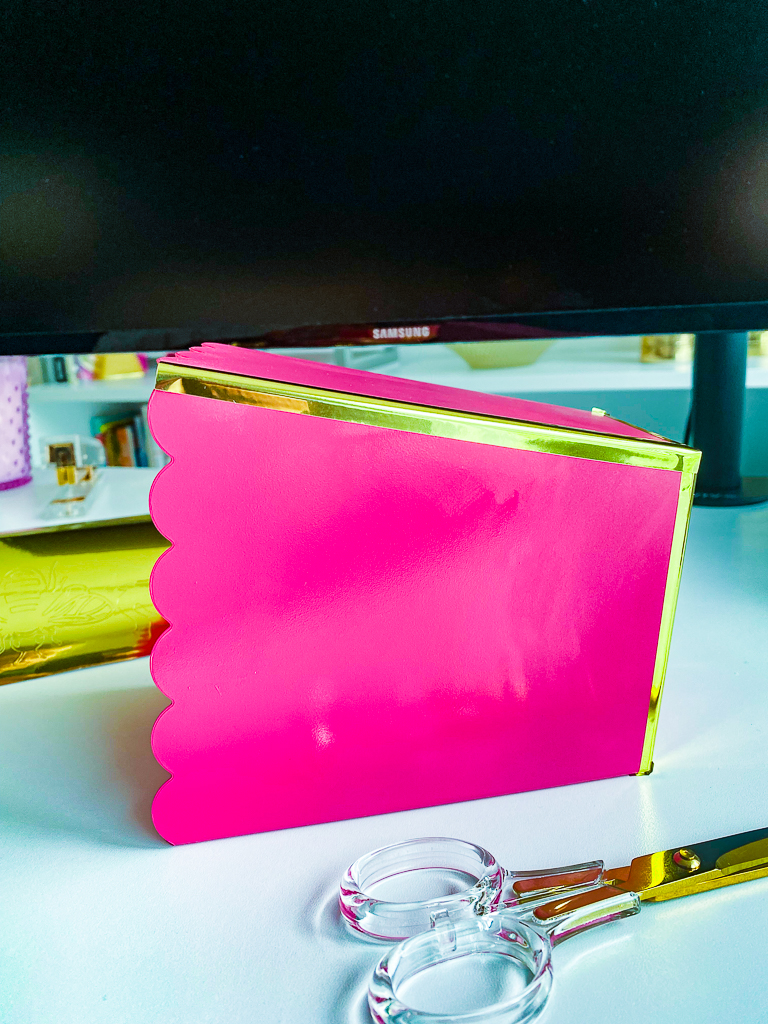
This DIY idea first struck me when I was at Dollar Tree and stumbled across these acrylic, scalloped containers. Their shape reminded me of the cachepots I’d been lusting after and my mind began to race.
This. Might. Be. It.
I purchased three and ran home.
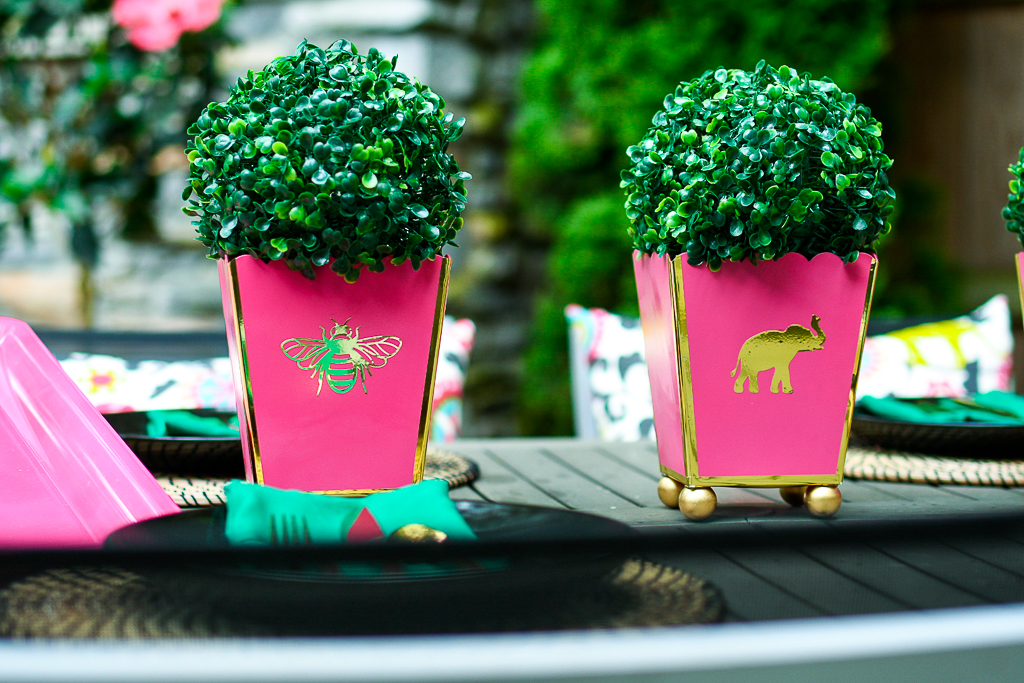
For my cachepots, I chose to pull out the hot pink color in my pillows.
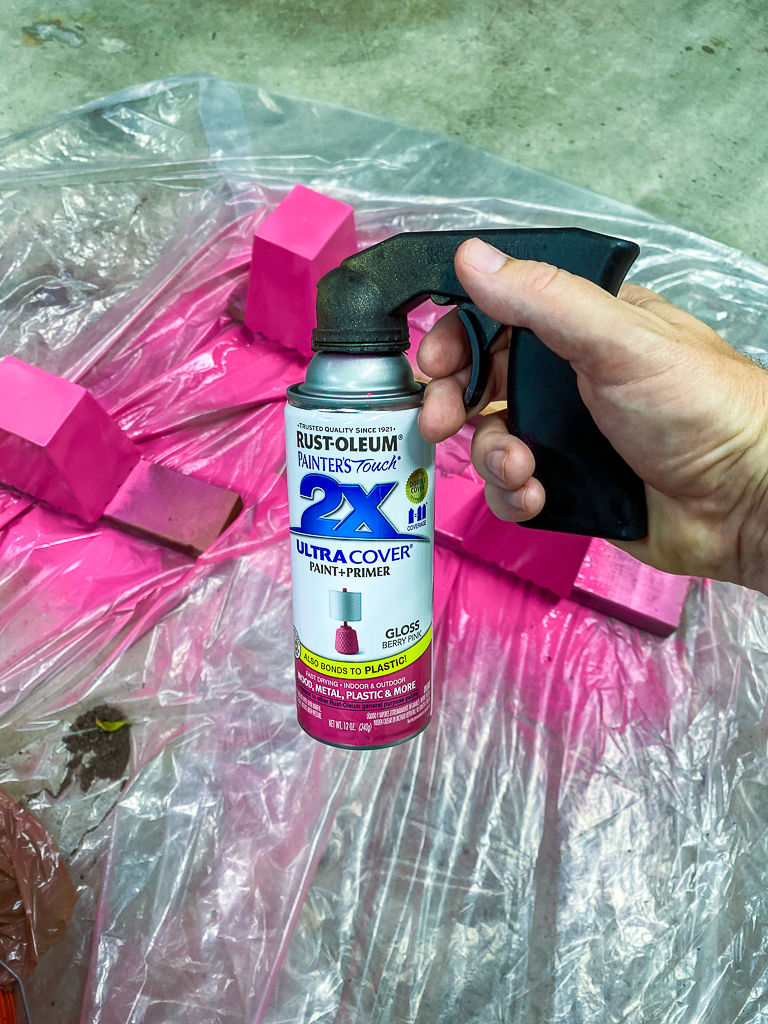
Rust-Oleum 2x Ultra Cover Paint+Primer in Gloss Berry was the perfect choice to cover the containers.
Using the Rust-Oleum Spray Grip was key to create a smooth even finish that truly give the pots a custom look.
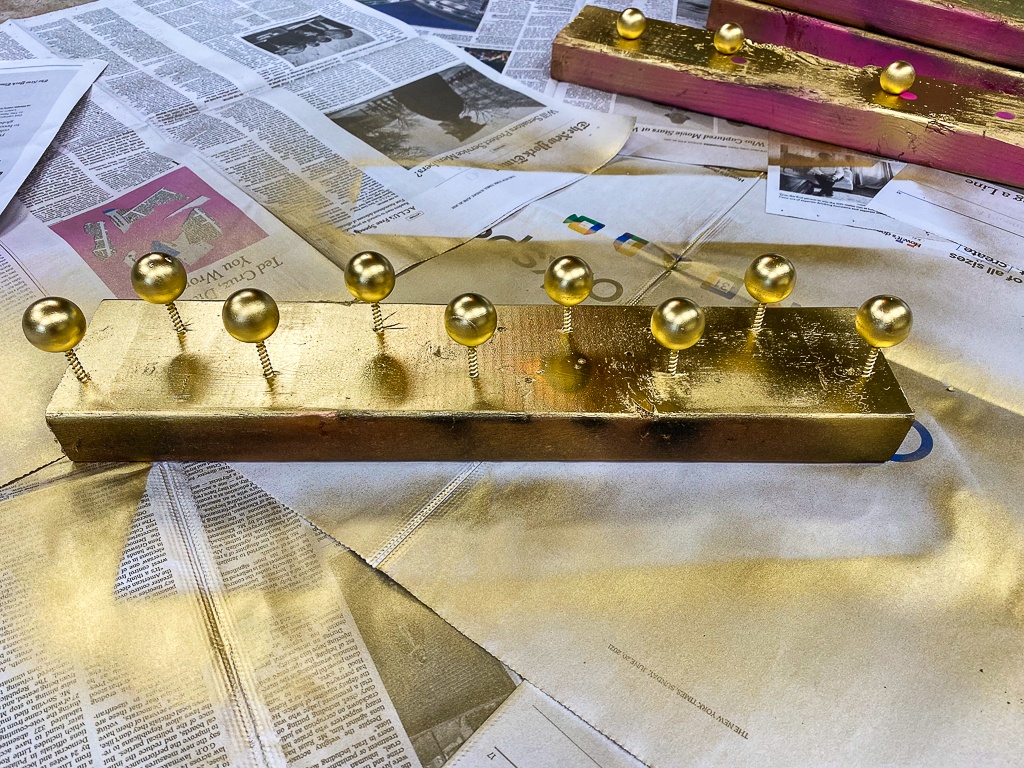
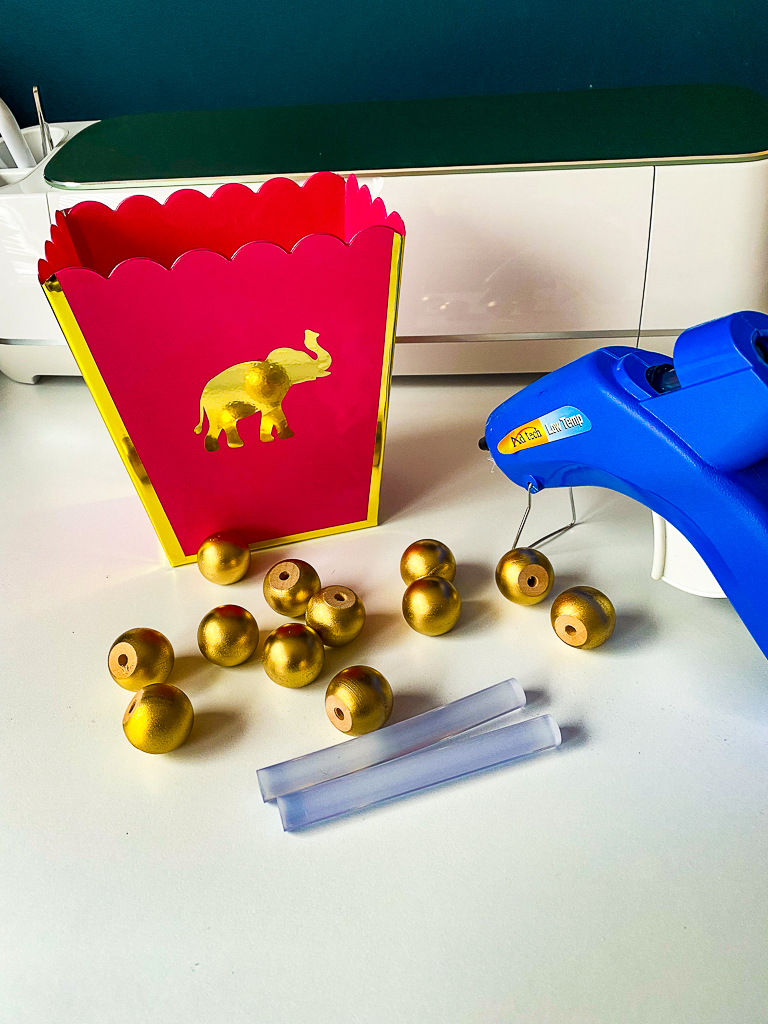
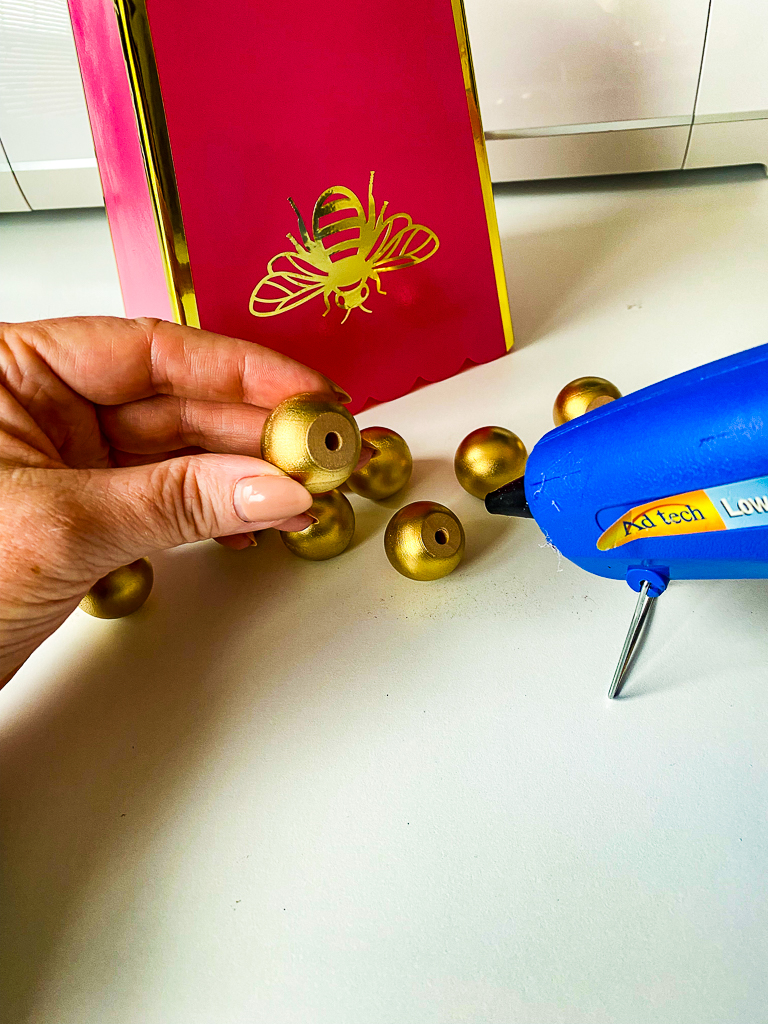
For the feet of the pots, I found wooden ball knobs that were absolutely perfect.
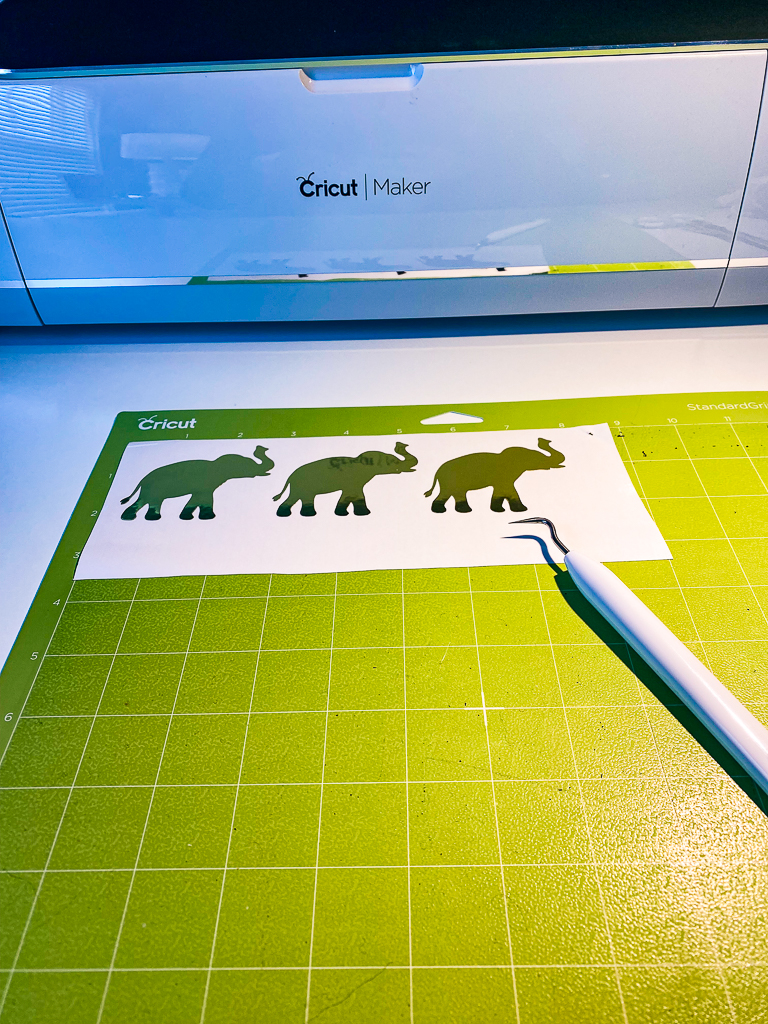
I knew a bright gold would be a perfect accent for the hot pink and painted the wooden ball knobs with The only missing pieces were the gold trim elements, which were obviously essential to the overall look. To achieve these finishing details, I used my Cricut maker to create elephant and bee decals in While I applied the elephants and bees with traditional transfer tape, I simply placed the rectangular stickers on the pot and trimmed the ends. It was easy. I used hot glue to secure the painted wooden knobs and the project was done! Almost … I still needed greenery or flowers to fill the cachepots. Since these cachepots are acrylic, they are fairly lightweight. They wouldn’t hold anything heavy and I needed exactly the right “topper.” I found these artificial boxwood balls on Amazon and they were exactly what I needed to finish the look. Their weight and dark green hue are perfect to pair with the adorable DIY cachepots. I am obsessed these cachepots and hope you will like them too! Love this idea? Discover these Five Great Ideas for a Summer Tablescape. Did you try this idea? Share it on Instagram with the hashtag #makeeverydayanevent and tag @makeeverydayanevent! 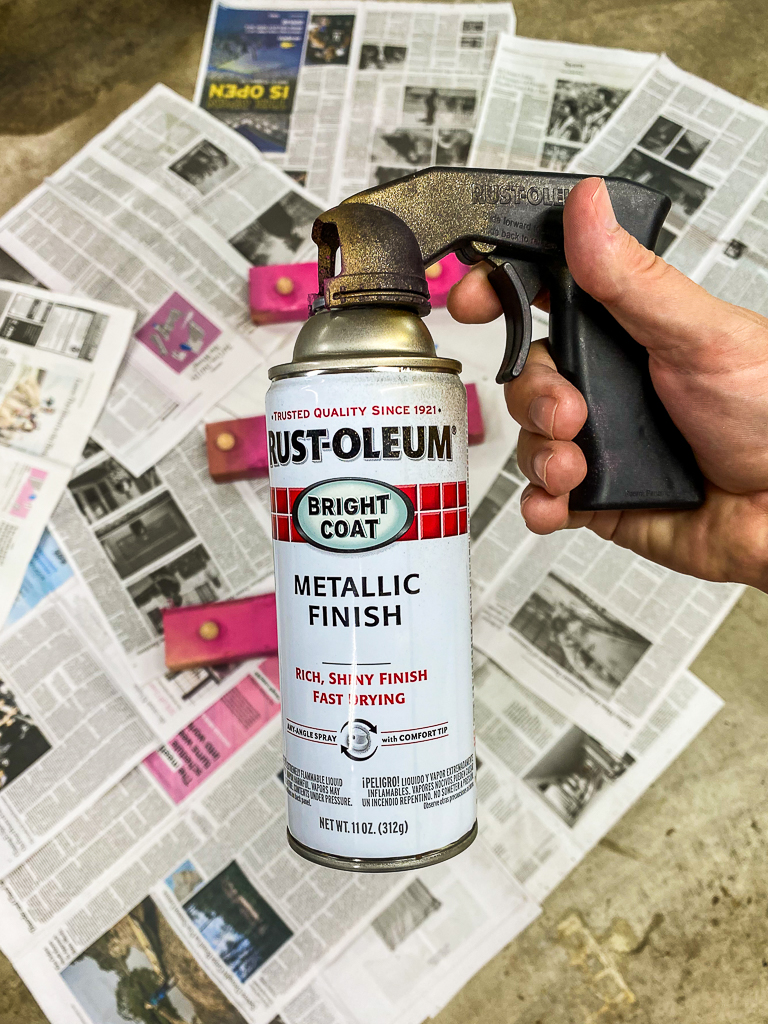


I text my other diy friend not long ago asking how we could make these. I knew there had to be a way!! These are perfect!
Glad you found them Madison! Happy to help!
Fantastic make!