THIS DIY WELCOME MAT IS EASY TO MAKE AND A LOOK YOU’LL LOVE FOR LESS!
This DIY welcome mat will give you the look of a luxury front door mat, for a lot less! We show you how to make it in four easy steps!
Some days, it’s the little victories that are worth celebrating.
And this is one of those days.
Because for months, I’d been eyeing these super cute, initial front door mats that are made of coconut fiber.
I love their classic simplicity.
But I didn’t love their price tag, which is why I hadn’t pulled the trigger on buying one.
I found some great luxury front door mats on Grandin Road for more than $89, Pottery Barn had a cute one at $99 and they were selling an adorable option on Frontgate for close to $120.
Those prices were way more than I wanted to spend.
And then I came up with a solution …
Because you know how much I LOVE to create the exact same look for less!
For about $15 and a little bit of DIY time, I made the DIY welcome mat of my dreams.
And you can too!
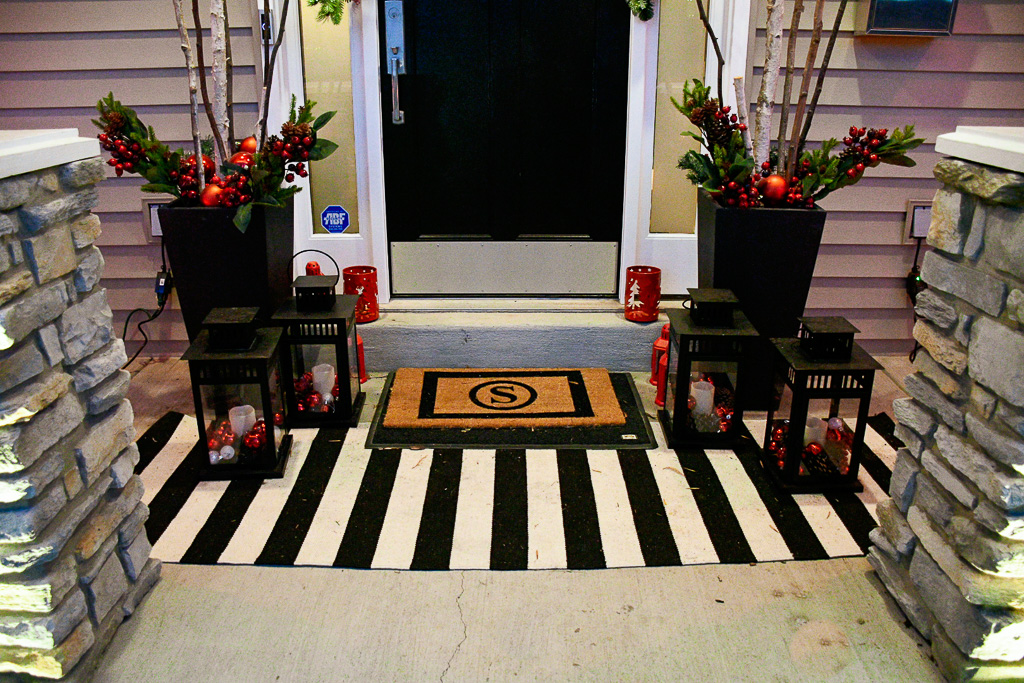
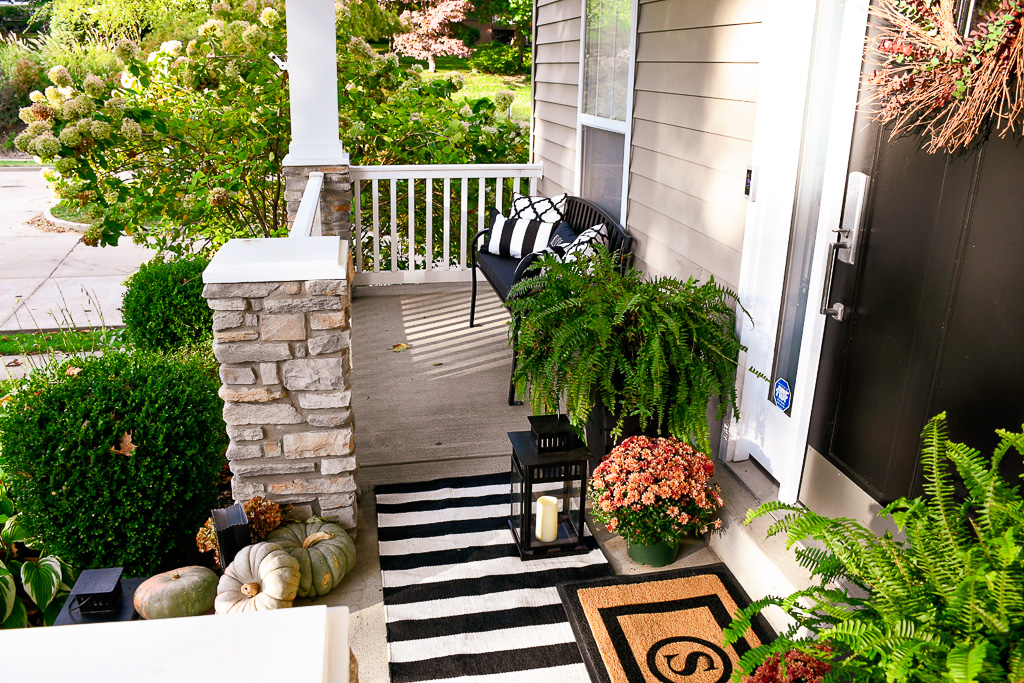
This personalized door mat will work with my decor from season to season …
HOW DO YOU MAKE YOUR OWN DOOR MAT?
I’ll show you how to make this DIY door mat it in four simple and easy steps.
Posts on Make Every Day an Event may contain affiliate links which means we may earn a small commission on purchases at no extra cost to you. To learn more, please read our full disclosure here.
1. CHOOSE A FRONT PORCH MAT MADE OUT OF COIR OR COCONUT FIBER.

There are lot of great blank mats at a variety of retail stores, as well as online.
Hobby Lobby, Ikea and Home Depot all have great options.
Amazon also has some good choices and this 17″ x 30″ mat was just perfect for this project.
2. DESIGN THE MONOGRAM AND CREATE THE DESIGN OF YOUR CHOICE …
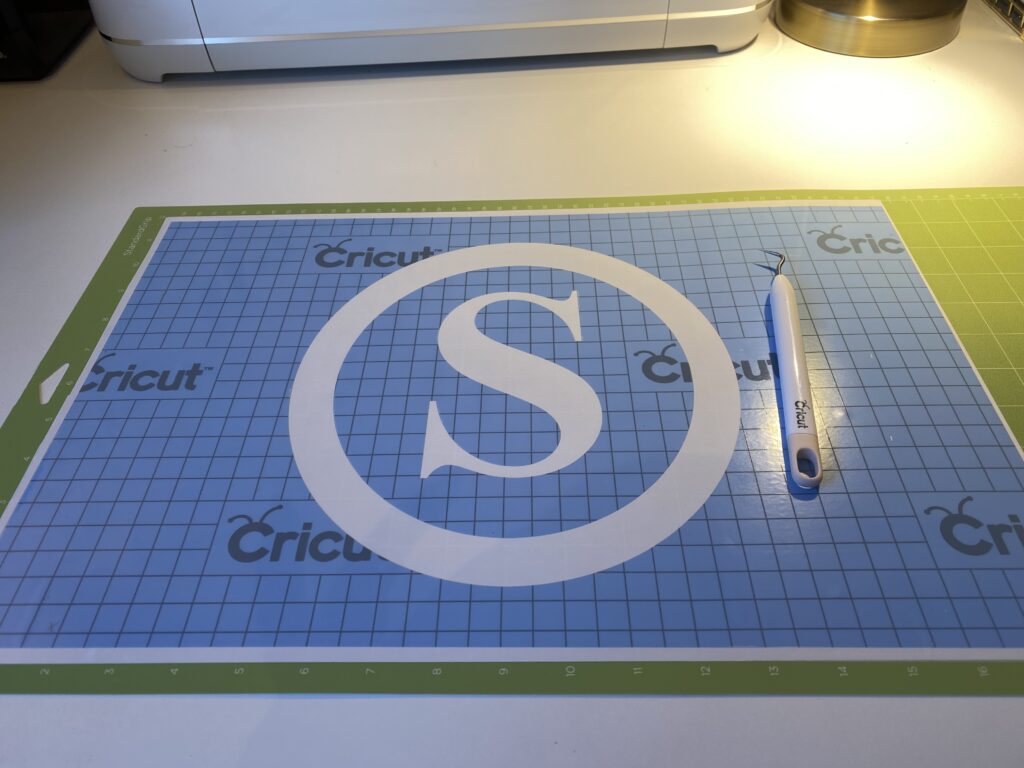
My Cricut maker was essential for this project.
I knew I wanted something a bit more than just a simple monogram letter. So I worked with the positive and negative space to center the “S” within a circle and then place that circle within the outline of a rectangle.
I created a stencil out of permanent vinyl.
You need the roll of vinyl and not a single sheet because of the size of the stencil.
Since the oversized monogram doormat is large, using the larger cutting mat with my Cricut maker was key.
And don’t worry about the word “permanent.”
Because of its rough texture, the vinyl is not going to stick to the point of not being removable.
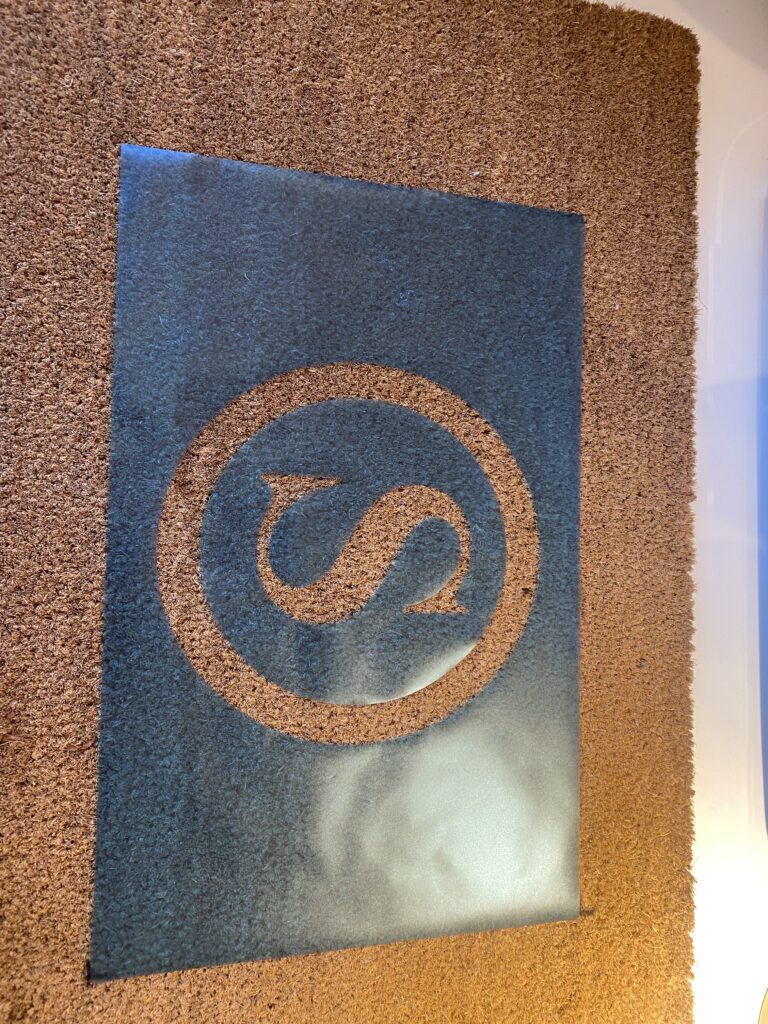
Realizing any space not covered by the doormat stencil or painter’s tape (I prefer Frog tape) would get covered in black, I carefully taped off a border all around the mat.
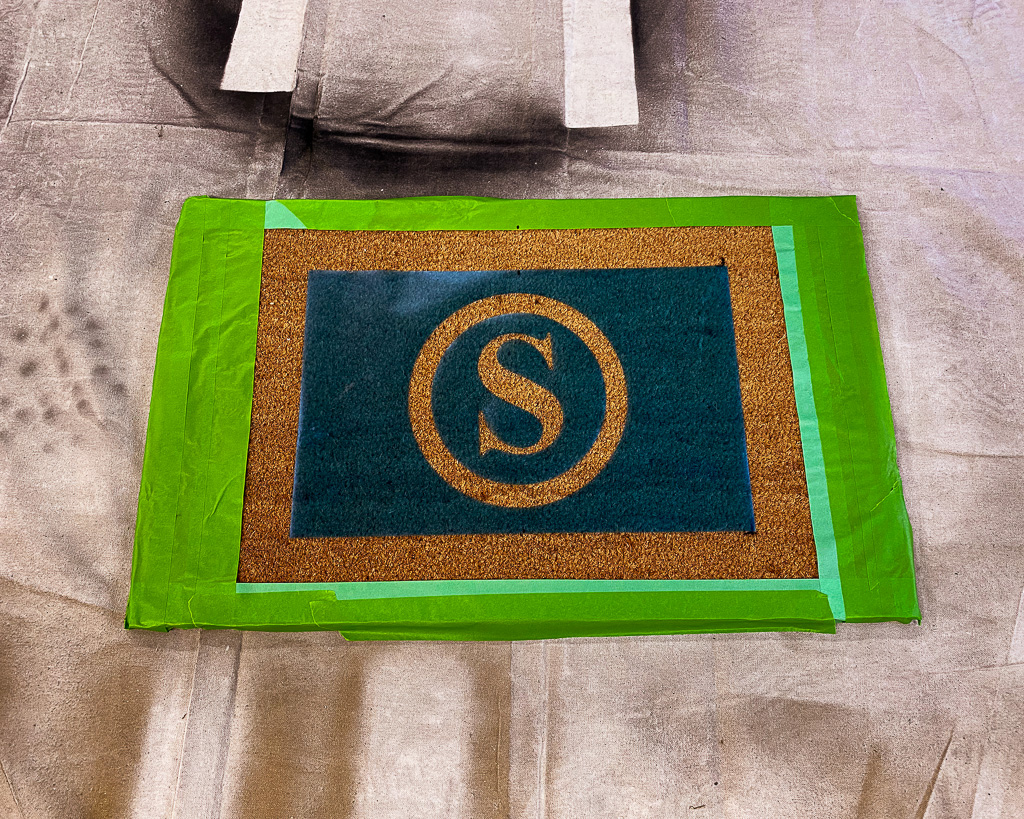
It created a nice outline for the entire design.
3. PAINT THE DESIGN ON THE MAT, BUT DON’T USE PAINT …
So you want me to do what … ?
Just keep reading and I’ll explain. LOL.
The secret to making this project really look high end, lies in this third step.
There are a few key factors to remember and the first one is to not use traditional spray paint.
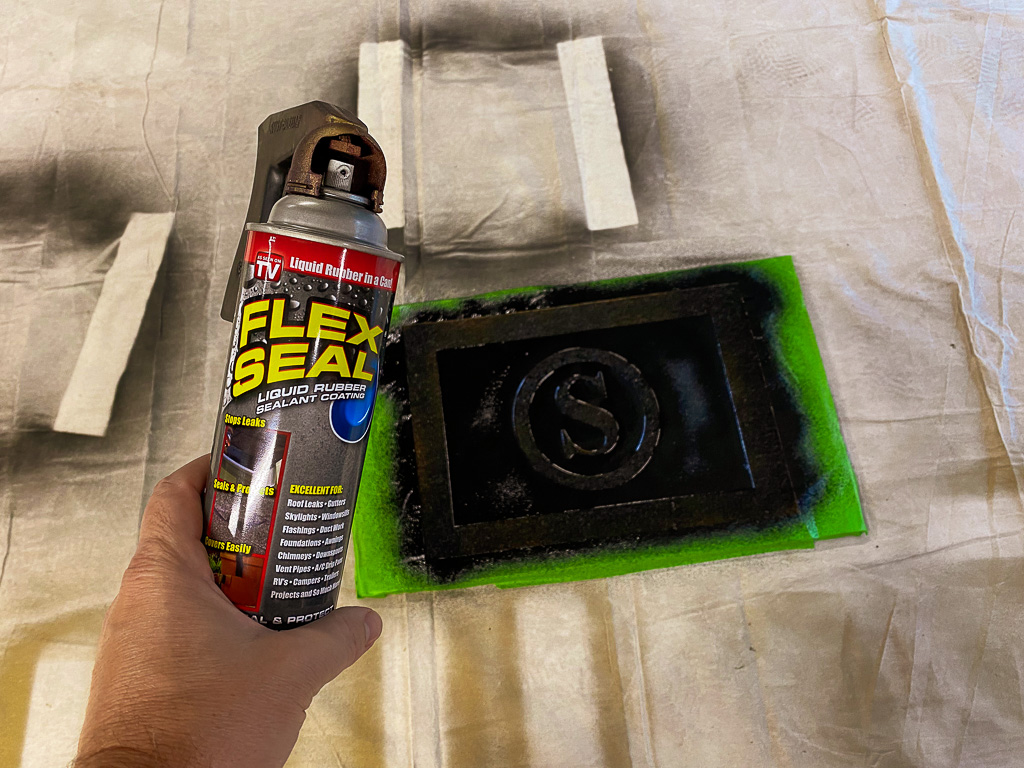
The best choice for this application is black Flex Seal spray.
The Flex Seal spray is much thicker than traditional spray paint.
Its thickness means it will seep into the coconut fibers and when dry, will form a rubberized surface that blocks out water, which makes it the perfect choice for a front door mat!
Another tip … make sure the stencil design is firmly on the mat.
You need to take care when spraying DIY doormat with Flex Seal to make sure none of the paint seeps under the stencil.
Because if that happens, you’ll wind up with fuzzy edges.
And nobody wants that!
Finally, be sure to spray the stencil directly from the top.
If you spray at an angle, the pressure of the spray can lift the stencil.
And again, you won’t get the crisp edges and lines that make this design so sharp!
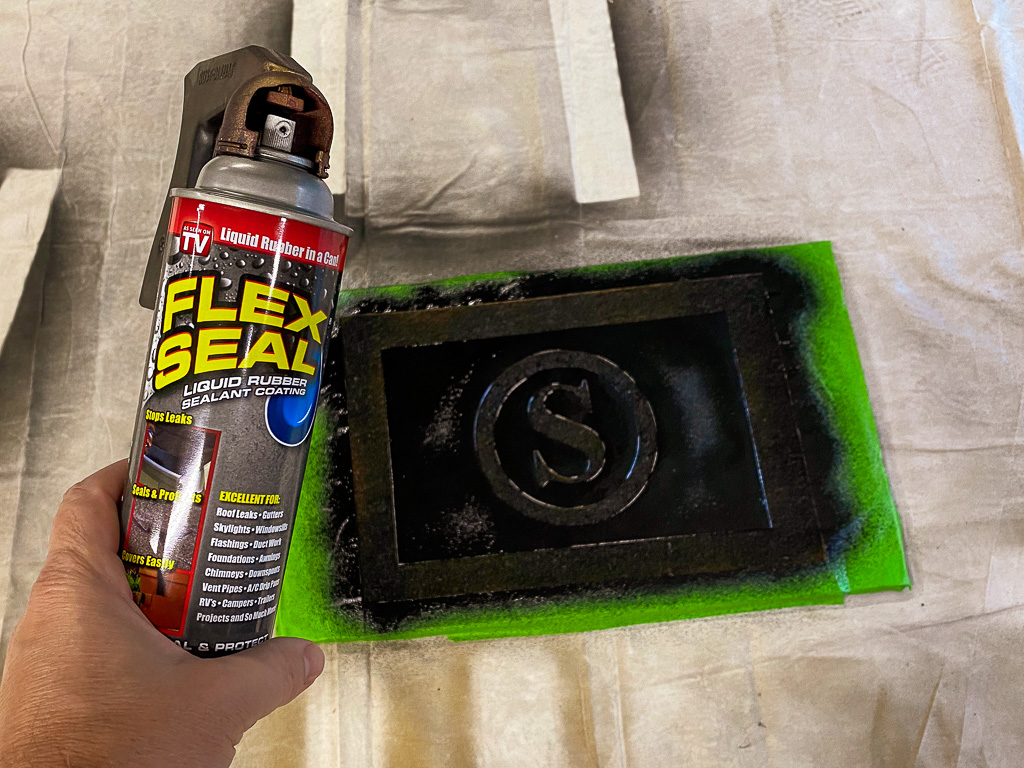
4. CAREFULLY LIFT THE STENCIL FROM THE MAT
To complete the oversized monogram doormat, I carefully removed the doormat stencil from the rug, as well as the painter’s tape from the border.
You want to do this when the Flex Seal is set but not dry.
If you wait too long, the stencil will adhere to the paint and the edges will not be neat.
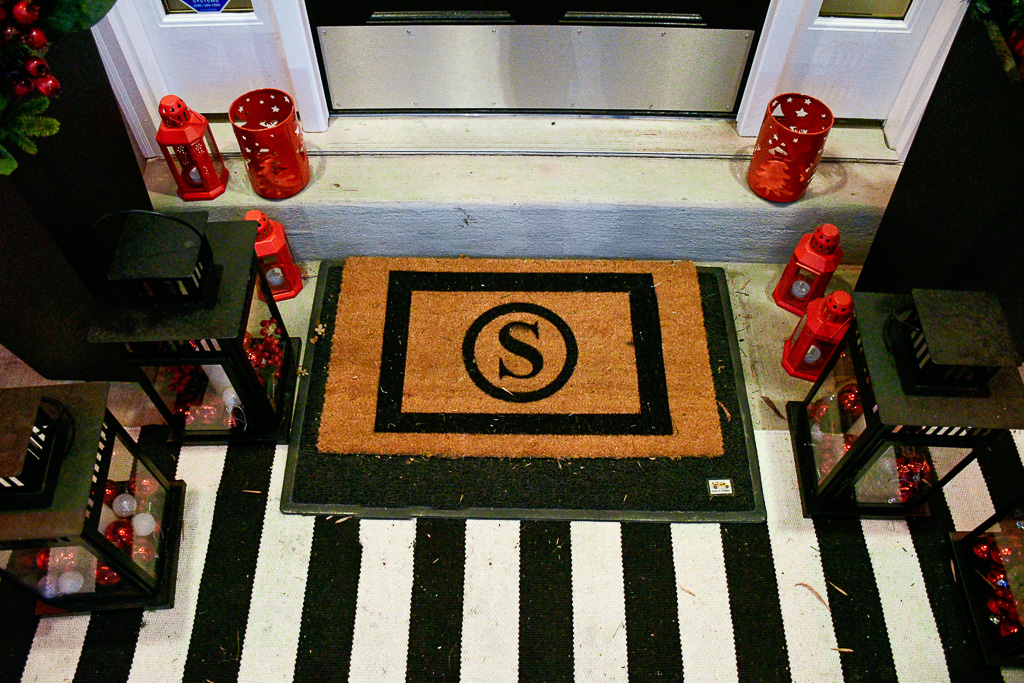
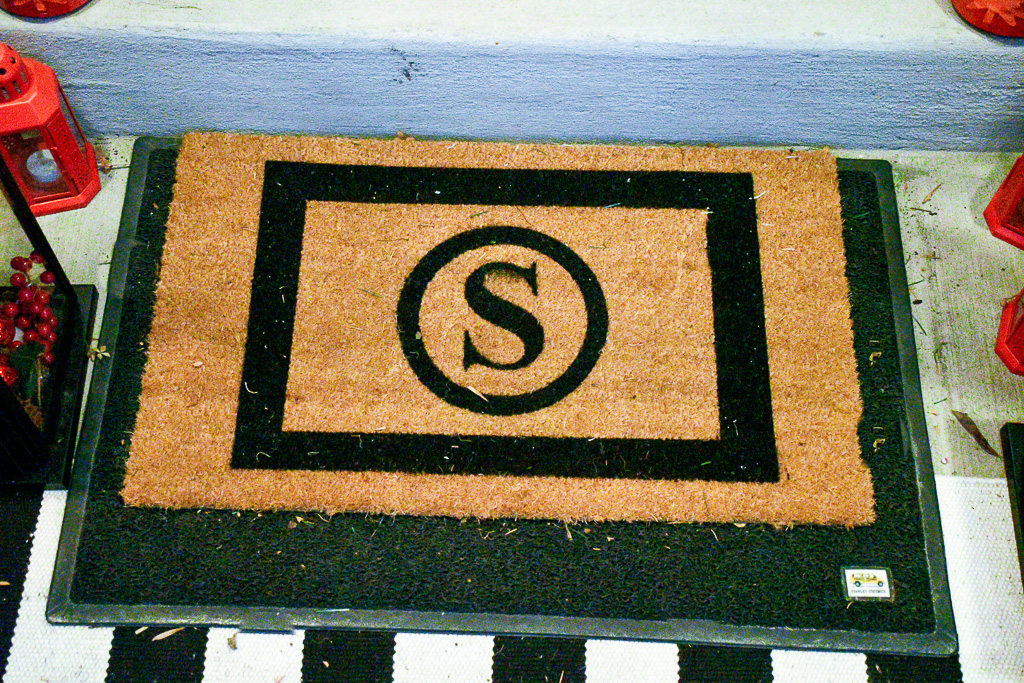
I just love the way this DIY Welcome mat dresses up our front porch and I know you’ll love it too!
Plus the entire project cost me less than $20!
Looking for other great DIY ideas? You’ll find lots of great inspiration in these posts:
DIY Cachepots are Great for Your Outdoor Table
Beautiful Gold Napkin Rings are Easy to Make
Did you try any of these DIY decor ideas?
Share them on Instagram with the hashtag #makeeverydayanevent and tag @makeeverydayanevent.
If you have any questions or suggestions, contact us or leave a comment!
Follow us on social media! You can find us on Instagram, Pinterest, and Facebook.